In this article I will be showing you how I made two diy chess boards with two different designs. These are regulation size chess boards, meaning that the individual squares are between 2″-2.5″.
In my case, the squares are 2.25” for an overall board size of 18”. These are end grain chess boards made from walnut and ash.
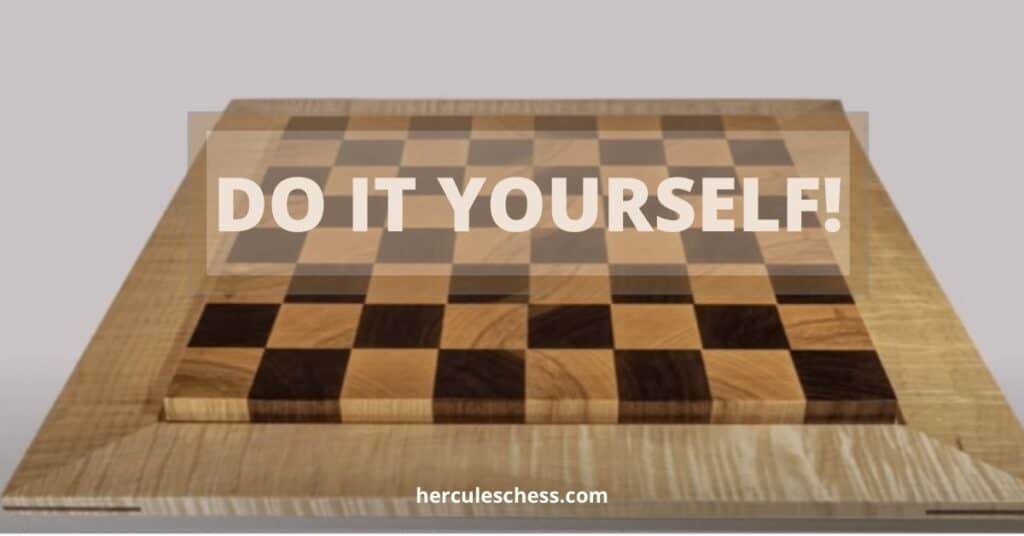
Each chess board has a “frame” around it that can serve as a place to put the chess pieces that are no longer in play. One of the chess boards has a 3.5” walnut frame, and the other one has a 3” frame made from tiger maple.
The walnut frame is flush with the bottom of the chess board, whereas the maple frame is elevated and “floating” along the side of the chess board. Both chess boards are 1.5” thick.
The one with the walnut frame has an overall width of 25” and the one with the maple frame is 24” x 24”.
Some of the tools I used in this project include:
- Grizzly G1023RLWX table saw.
- SuperMax 19-38 Drum Sander.
- Freud SD508 Super Dado set.
- Behlen Paraffin Oil.
- Behlen Pumice Stone.
With that said, let’s jump straight into making a diy chess board.
How To Make A DIY Chess Board?
Here are the steps to making a diy chess board:
Step #1: Cutting the squares of the chess board

The first thing I did was to cut the squares of the chess board out of ash and walnut. I used ash because it has a really interesting endgrain.
I used 10 1/4″ boards. These boards were so thick that I couldn’t cut it with a single pass. I had to flip them over to cut the other side.
I ran the pieces through the jointer to get a straight edge and then I ran it through my table saw. I used that straight edge along my fence to cut each board in half. That cut it down into a reasonable size so that I can run the face through jointer because I only have a 6 inch jointer.
The pieces are now at about 5 inches wide. I then ran the face through the jointer to flatten the face. I ran the edge through the jointer again to square it up.
I ran the boards through the table saw one last time to cut the individual pieces. I cut these a little bit larger than 2 1/4″ because they will run through the planer to get very precise dimensions.
Each of the pieces were ran through the planer. Because I want square pieces I ran them through top to bottom and side to side.

Step #2: Gluing the pieces
Before gluing, I adjusted the pieces so that the grain is oriented in a similar direction for all the pieces. That will help when there’s any wood movement so that the expansion and contraction is relatively consistent in the same direction.
I wanted to make sure I didn’t get any saw dust or dust particles mixed in with the glue so I used some compressed air to clean my work surface.
I applied a liberal amount of glue. I wanted to make sure this glue is up flat so I elevated the board and placed a piece of plywood under it that I can clamp it to. This also helps to position the clamp from side to side when it is elevated a little bit off the table.

I placed down a little bit of parchment paper first so that the board doesn’t stick to the plywood when I am gluing up.
Step #3: Clamping
I clamped the strips with light pressure from side to side. I used some cauls across the top and the bottom to apply vertical pressure to make sure that the boards are gluing up flat.
I then tightened it up from side to side and let it glue up overnight.

Step #4: Sanding the chess board
After removing the clamps and before running it through the drum sander, I cleaned up some of the excess glue. I started with a plane and then I used a random orbit sander just to remove some of that excess glue which tends to really gum up the drum sander.

The sanding belts on the drum sander are relatively expensive so I wanted to do whatever I can to prolong their life.
I sand it to a minimum amount possible because everytime I run it through the sander I’m reducing the thickness thereby making the squares less and less square.
When I finished sanding both sides, I had removed about less than 1/16 of an inch and that will not be noticeable to the naked eye.
The final board is going to be 1 1/2″ thick so I set up my stock block to be a little bit further away from the blade so that I have room for sanding after it is all glued up.
First I run the end of the board through the blade to square it up. I then cut off the individual pieces.
Step #5: Designing DIY chess board #2
I had enough material to make two chess boards. One board is going to have the walnut frame and the other board is going to have a slightly different design with a frame wood made from Tiger maple.
Once I got close to the end of the board I swap out the crosscut sled and just used the fence on my table saw.

As you can see the board started to come together and it was ready to glue up into the chess board.
Just like the first glue up, I had the board elevated on a sheet of plywood to help ensure that it’s flat as possible.
I used cauls along the ends of the boards to make sure that the ends are all lined up. I then clamped it in the other direction as well. Additionally I used boards across the top to help compress it and make sure that everything is flat.
I had to remove a fair amount of thickness, so I started with a 36-grit sandpaper. I did clean the sandpaper fairly frequently to prevent it form clogging up especially with the glue. After a few passes I changed it out and used 100 grit and then 120 grit.
Now using the crosscut sled, I trimmed up the edges just ever so slightly to make sure that everything is square and aligned.
Step #6: Cutting the grooves of the chess board to make frame
I cut a groove around the perimeter of the board where the frame pieces are going to insert into. (It will be a tongue and groove kind of joint. The tongue will be exactly 1/2″).
I elevated the dado blade to be just a little bit more than 1/2″ so that there’s a little bit of room for wood movement inside.
I made sure the chess board remains vertical while I am cutting the groove so I have a tall piece of MDF that I’ve clamped up against my fence.
For the piece that will form the frame, I joined the board to get a nice straight edge so that I can run it through my table saw. (The frame is going to be 3 1/2″ wide so that means with a 1/2″ tongue the total width needs to be cut to 4″). I then ran it through the planer to get a 1″ thickness
I run the boards through the drum sander to clean them up. Then using the dado blade, I cut the tongue that’s going to fit into the groove that runs along the edge of the chess board.
Next, I cut a 45 degree miter and I had a board clamped to my miter gauge that marks exactly where the blade is going to cut. This helped me to cut the miters to the exact dimensions that I need.
I did a test fit before gluing and everything fit perfectly! I then went ahead and glued it up.

To allow for wood movement I wasn’t sure what was going to happen, so I placed a little dot of glue in the middle of the tongue that way if the wood of the chess board does want to expand then its free to move.
I then clamped it up in both directions. I also clamped it vertically just at the corners to make sure that the wood is aligned.
Step #7: Designing the frame of chess board #2
Now the frame on the other chess board is made out of tiger maple and it’s going to be designed a bit differently. It’s elevated off the bottom so it’s not flushed with the bottom of the chess board.
I also beveled the bottom by about 10 degrees so that you can get your fingers under bottom to lift the chess board. I clamped it up the same way.

Since the walnut frame is flushed with the bottom of the board, I used my router to cut some finger slots in the bottom. I did this in two passes, I started with the router bit a little bit lower than I needed it and then I raised up. This helps to get a cleaner cut and helps to avoid any unnecessary tear out.
I cut some splines to put into the corner of the joint. That helps to reinforce the joint and it also gives it a nice design touch.
I cut them to the maximum height of my blade. I would have made them a little bit bigger if I could have except my blade will not go any higher than this. I also clamped the board into the jig because I wanted to make sure that the cut is pretty precise.
The spline is going to be a little bit thicker than the thickness of my blade so I cut them in two passes.
On the walnut frame, I used splines made of ash and on the maple frame I used splines made out of walnut. I cut up some walnut on my bandsaw and I ran it through the sander to get it the right thickness. I insert them and then clamped them up.
After it was glued up, I cut off the excess and then sand it down to be flushed with the edge of the frame.
I did a little bit of sanding to round over the edges to remove any sharpness and to clean everything up.
Step #8: Applying Finish To Both Boards
I then applied the finish. I used a wipe on polyurethane to wipe multiple thin coats with a rag. I put about six coats on each side. I really wasn’t happy with the way it was turning out as there were little streaks in the finish. So I decided to finish it up with a sprayer to put the final three coats on.

After the varnish had cured for a couple of days, I rubbed it down with pumice stone. This helps to make it really smooth it also removes some of the sheen that professional chess players don’t really like to have on the board. I used pumice stone mixed with paraffin oil then I wiped off the oil with paper towel.
I then applied paste wax to polish and protect the board.
So that’s it! Here are some photos of the boards so you can see how everything turned out:
Maple DIY Chess Board

Walnut DIY Chess Board